
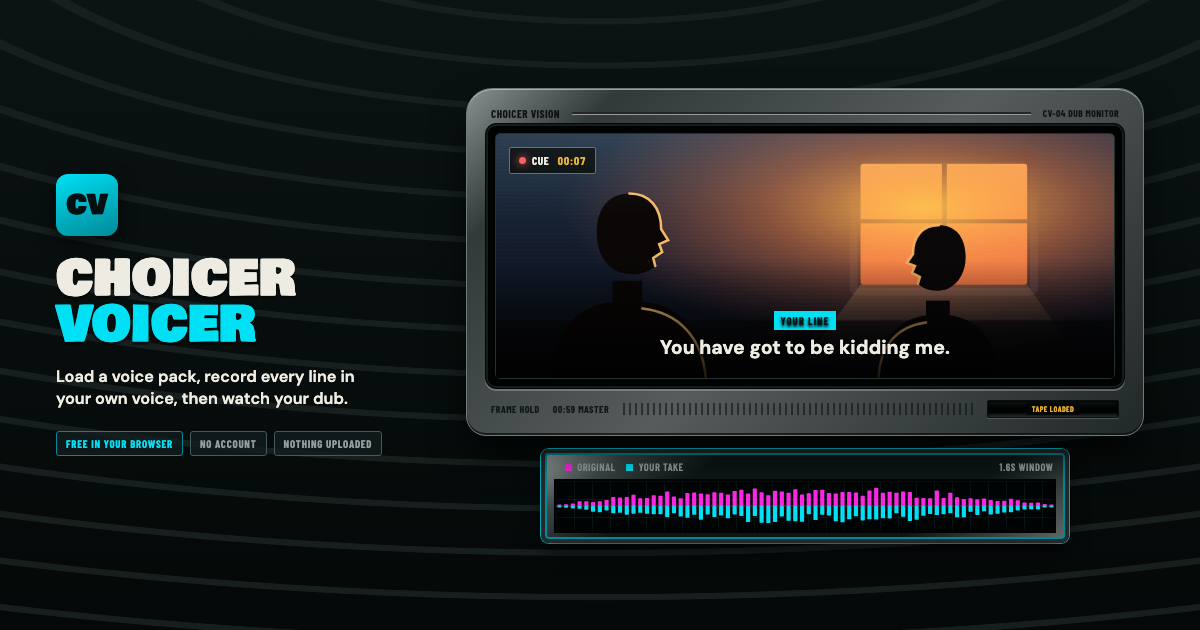
After each take, the Studio draws your recording over the original clip. The horizontal direction is time. The vertical height is level. That simple picture catches problems that are hard to name while listening.
Know what the display shows
The original line and your take use different colors, identified by the legend above the graph. The marked clip window shows the intended dialogue range, with a little extra time around it. The playhead moves through the waveform during playback.
Silence looks flat. Speech produces clusters of peaks. A pause appears as a thinner section between those clusters. You do not need to read individual words; compare the larger shapes.
Check the entrance first
Look at where the first clear group of peaks begins. If your take starts to the right of the original, you entered late. Hear the clip again and pay attention to the visual cue just before the first word. Starting on the breath before a sentence often works better than waiting for the exact syllable.
If your peaks begin far to the left, you may be anticipating the line. That can sound fine in a fast exchange, but it can also talk over a sound effect or the previous speaker in the final scene.
Then compare the ending
A take that extends beyond the original may collide with the next line. Try a faster delivery or start earlier rather than clipping the final word. A take that ends much sooner can leave a dead pocket where the original scene expected speech.
A laugh, sigh, or deliberate pause can make your waveform longer for a good reason. Judge the scene, not only the boundary line.
Use the middle to find pacing changes
Compare the clusters inside the line. If the original has two phrases with a gap but your take is one continuous block, you skipped a pause. If your shape is spread out with several gaps, you may be searching for the words while recording.
The fix is often rehearsal rather than editing. Hear the original, say the line once without recording, then press R. Knowing the sentence frees you to watch the video cue instead of reading every word at the last moment.
Treat height as a rough level guide
If your waveform is consistently much taller, the recording may jump out of the mix. Move slightly away from the mic or reduce hardware gain. If it is tiny, move closer before turning on Automatic volume; getting the position right usually sounds more natural.
Waveform height is not a precise loudness meter. A low voice and a sharp voice can look different even when they feel equally loud. Confirm any visual suspicion with and then with the full dub.
Five patterns worth recognizing
- Same length, shifted right
- The delivery is probably late. Cue the first word sooner.
- Starts together, ends late
- The take is slower. Tighten pauses or speak with more forward momentum.
- Starts late, ends together
- The take is compressed. You may be rushing to catch up.
- Much taller throughout
- Check microphone distance or gain, then listen for distortion.
- Large peak before speech
- Look for a desk tap, breath pop, cable knock, or click at record start.
Know when to ignore it
Choicer Voicer is a dubbing game, not a lip-sync certification test. A slow deadpan read over a frantic original can be the joke. A character interruption may be funnier when it arrives too early. If the full scene works, the waveform has done its job even when the shapes disagree.
Use the graph to answer a question you can already hear. Do not invent a problem because two colored shapes fail to match.