
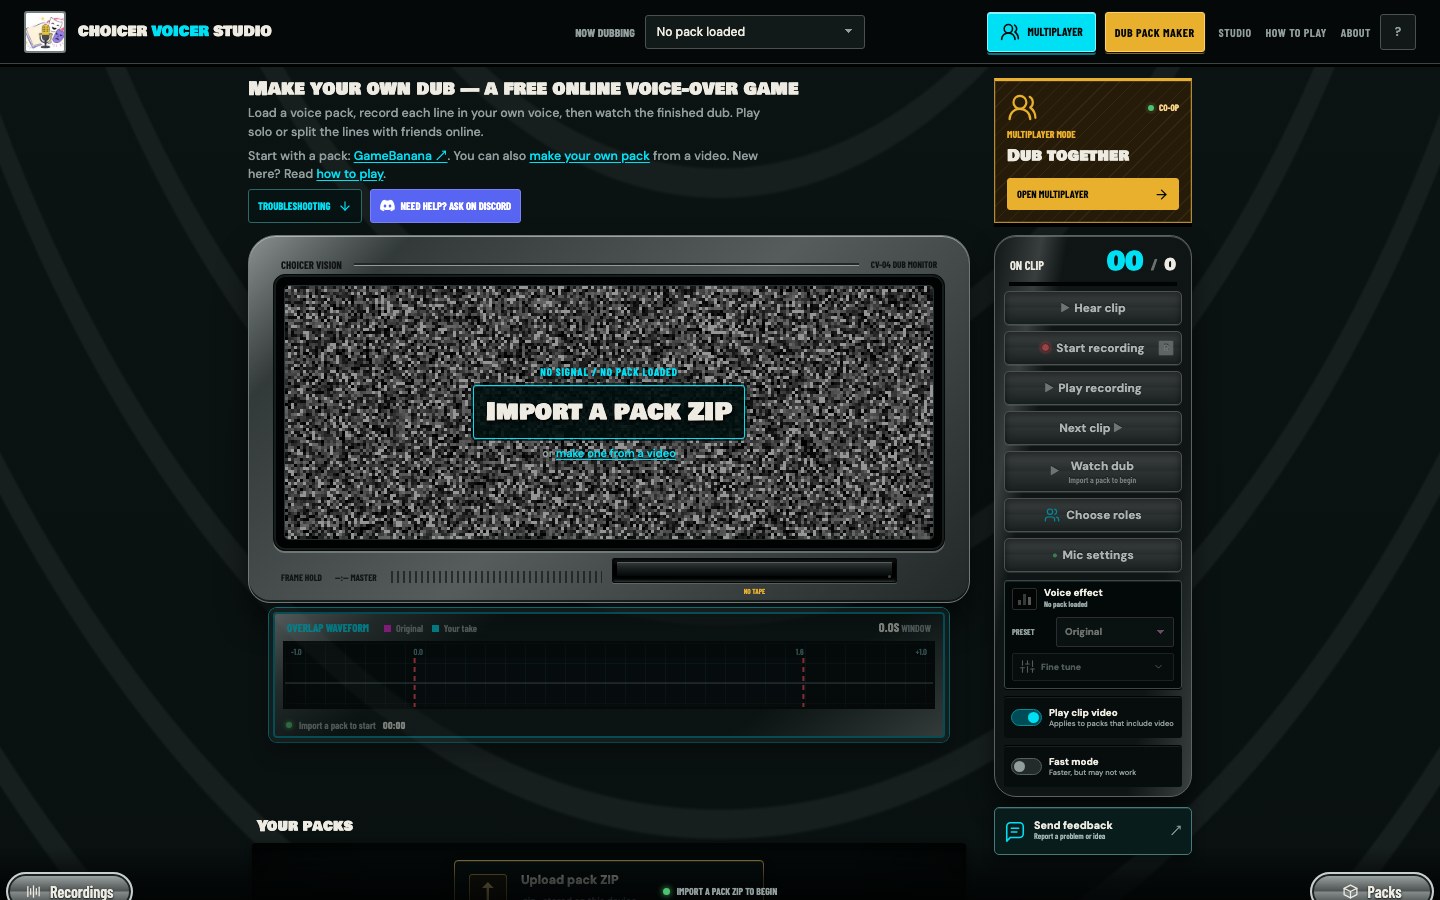
The shortest first session uses a pack somebody has already made. A pack contains the scene, each isolated line, the written captions, and usually a backing track with the dialogue removed. The Studio keeps those pieces together while you work through the performances.
Use headphones if you have them. Laptop speakers are loud enough to leak the original line back into a built-in microphone, and that echo stays in the finished dub.
What to have ready
- A recent Chrome, Edge, Firefox, or Safari browser on an HTTPS connection.
- A microphone. The one built into a laptop or phone is enough for a first run.
- A Choicer Voicer pack saved as a ZIP. Leave it zipped.
You can find community packs through the voice pack pages or on GameBanana. Check a pack's credits, source, license, and content warning before you use it.
Import the pack ZIP
Open the Studio and press in the monitor. You can also use the upload area under Your packs. Choose the ZIP as it was downloaded. Do not unpack it into a folder first.
The import happens in the browser. Once it finishes, the pack appears on the local tape rack and in the Now dubbing menu. You normally import a pack only once. It remains in this browser until you remove it or clear the site's stored data.
A ZIP over 250 MB can use a lot of memory while it is being opened. On a phone or older laptop, close other heavy tabs before continuing.
Listen before you perform
Press . The original line plays while its caption appears on the monitor. Listen once for the words and once for the rhythm. Where the actor starts, pauses, and stops matters more than matching the voice.
The current clip number appears at the top of the control rail. If the pack has several characters, the role label and color tell you who owns the line. For a first game, leave all roles selected and perform the whole cast yourself.
Record and review a take
Press or tap R. If the browser asks for microphone access, allow it and choose the input you want. The matching piece of video plays as a cue. Say the line, then stop the recording.
Your new take plays back immediately. Use whenever you want to hear it again. Recording the same clip a second time replaces that take, so there is no separate delete step and no penalty for trying a different read.
Do the whole pack once before polishing a single line. A slightly rough complete dub is much easier to judge than one perfect sentence with no scene around it.
Use the waveform as a timing check
The overlap waveform puts the original and your take on the same timeline. If your recording begins well to the right of the original, you came in late. If it runs beyond the original ending, shorten the delivery or start sooner. A much taller shape usually means your mic level is hotter than the source.
Do not chase a perfectly matching shape. The display is a reference, not a grade. A joke often works because the new delivery breaks the original rhythm on purpose. The waveform guide covers the useful patterns in more detail.
Finish, watch, and export
Press and repeat the listen, record, review cycle. The take counter and clip rundown show what is finished. You can jump back to any recorded line if one starts to bother you.
Once every required line has a take, becomes available. The final player runs the full scene with your recordings over the pack's backing track. Replay it before exporting; small timing problems are easier to hear in context than clip by clip.
Press to render a file locally. Keep the tab visible and awake while the progress bar moves. The file format and render speed depend on the browser and device, which is normal for an in-browser video tool.
First-session checklist
- The pack ZIP stayed zipped during import.
- Headphones are connected before recording.
- The intended microphone is selected in Mic settings.
- Every required clip has a take.
- The full dub has been replayed once before export.