
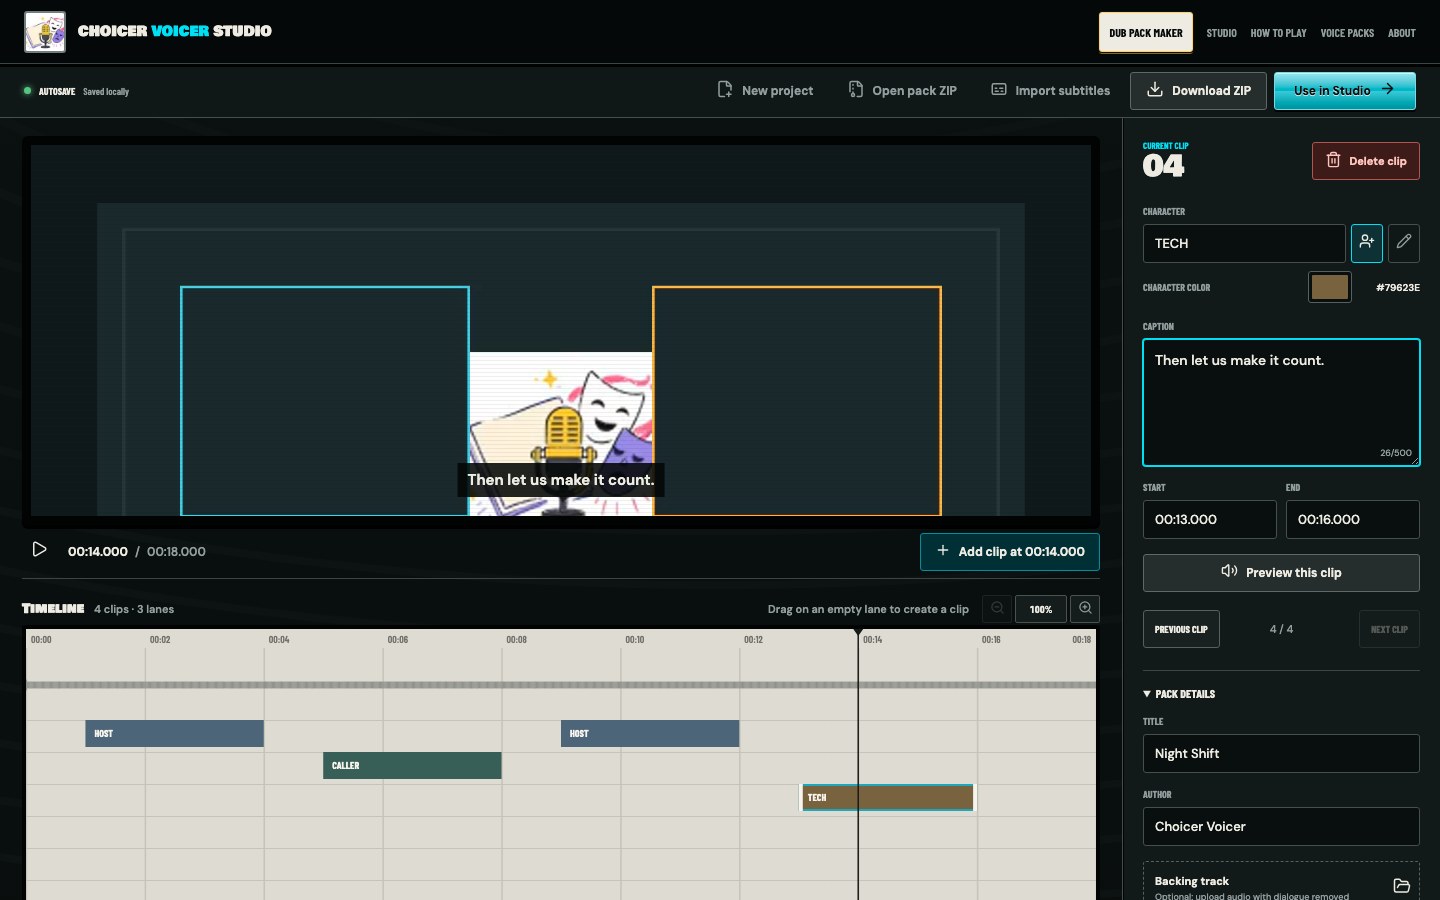
Start with a short scene. Thirty seconds to two minutes is enough to learn the editor and still short enough that you can test the whole pack several times. Pick video and audio you have permission to process and share.
Pack Maker accepts an MP4 up to 500 MB for a new project. The source stays on your device while the browser reads it and builds the ZIP.
Load the source video
Open Pack Maker and choose , or drop the file onto the media area. The editor opens as soon as it can read the duration. A waveform appears on the timeline after the audio has been decoded.
The title starts with the source filename cleaned up. Change it under Pack details and add an author name now, while you still remember what you want the finished pack to be called.
Create the first clip
Play to the start of the first spoken line, pause, and press . A three-second clip appears. Drag its left or right edge on the timeline to match the line, or enter exact Start and End timecodes in the inspector.
You can also drag across an empty timeline lane to create a clip in one move. That is faster once you know roughly where the line belongs. Use the zoom controls when short phrases are too narrow to trim accurately.
Leave a little breathing room. A clip cut exactly at the first consonant or final breath feels abrupt when the Studio uses it as a recording cue.
Name the speaker and write the caption
Select the clip and fill in Character and Caption. The character name becomes the role shown in the Studio. The caption is the line the player reads, so write what should be performed rather than every incidental sound in the source.
The first new name creates a character. Reusing that name puts later clips on the same colored lane. If somebody else speaks, use the new-character button and give them a separate name. The multi-character guide explains renaming and merging after the timeline gets busy.
Work through the rest of the scene
Move from line to line and repeat the same pass: set the range, choose the character, write the caption, then press . Preview catches the two common mistakes quickly: a line that starts after the first word, and a clip that includes the next speaker.
Overlapping dialogue can use overlapping clips. Put each speaker on the correct lane and give each line its own range. In the Studio, those still become separate recording prompts.
- Start and end
- The section of the video used as the visual and timing cue.
- Character
- The role label, timeline lane, and multiplayer assignment.
- Caption
- The words displayed to the performer in the Studio.
- Character color
- A visual aid for separating speakers; it does not change the exported media.
Decide whether you need a backing track
A pack works without a separate backing track, but the finished dub is much better when music, ambience, and sound effects continue under the new voices. If you have a dialogue-free mix, add it under Pack details. It should start at the same time and run for roughly the same duration as the video.
If you do not have one, leave the field empty for this first project. Do not use the full source audio as a backing track; the old dialogue would play underneath every new take.
Understand the local autosave
Pack Maker saves the current project in browser storage while you edit. The status strip at the top reports when it has saved. Returning on the same browser can restore the video, timeline, captions, characters, and backing file.
That draft is a convenience, not an archive. Starting a new project replaces it, and clearing site data removes it. Download the ZIP before you switch projects if you need a durable copy.
Download and test the ZIP
Press . Pack Maker checks that the project has a title, at least one clip, valid characters, and a caption for every line. Fix any message it shows before continuing.
The format dialog can make the video Choicer Voicer compatible. If conversion is needed, the browser may download a local FFmpeg converter before it builds the archive. Keep the page open until the ZIP reaches your downloads.
The quicker final check is . It builds the pack and hands it to the Studio for import. Hear every line once before sharing the ZIP. A caption typo is harmless; a clipped first word means going back to the timeline.
A sensible first-pack review
- Every spoken line has one clip and a readable caption.
- Clip starts preserve the first consonant and ends do not catch the next speaker.
- Character names stay consistent across the scene.
- The title and author fields are filled in.
- The generated ZIP imports and previews in the Studio.